
Plan
Today’s plan was to spend only a few minutes on this project to assemble the MK2.3 extruder that I had talked about in the last post. It turned out not to be as trivial, because one of the printed parts did not fit..
Issue
Basically, we encountered another issue here with the extruder. While being rather minor compared to the previous problem with the Bondtech-gears, it still took me quite a bit of time.
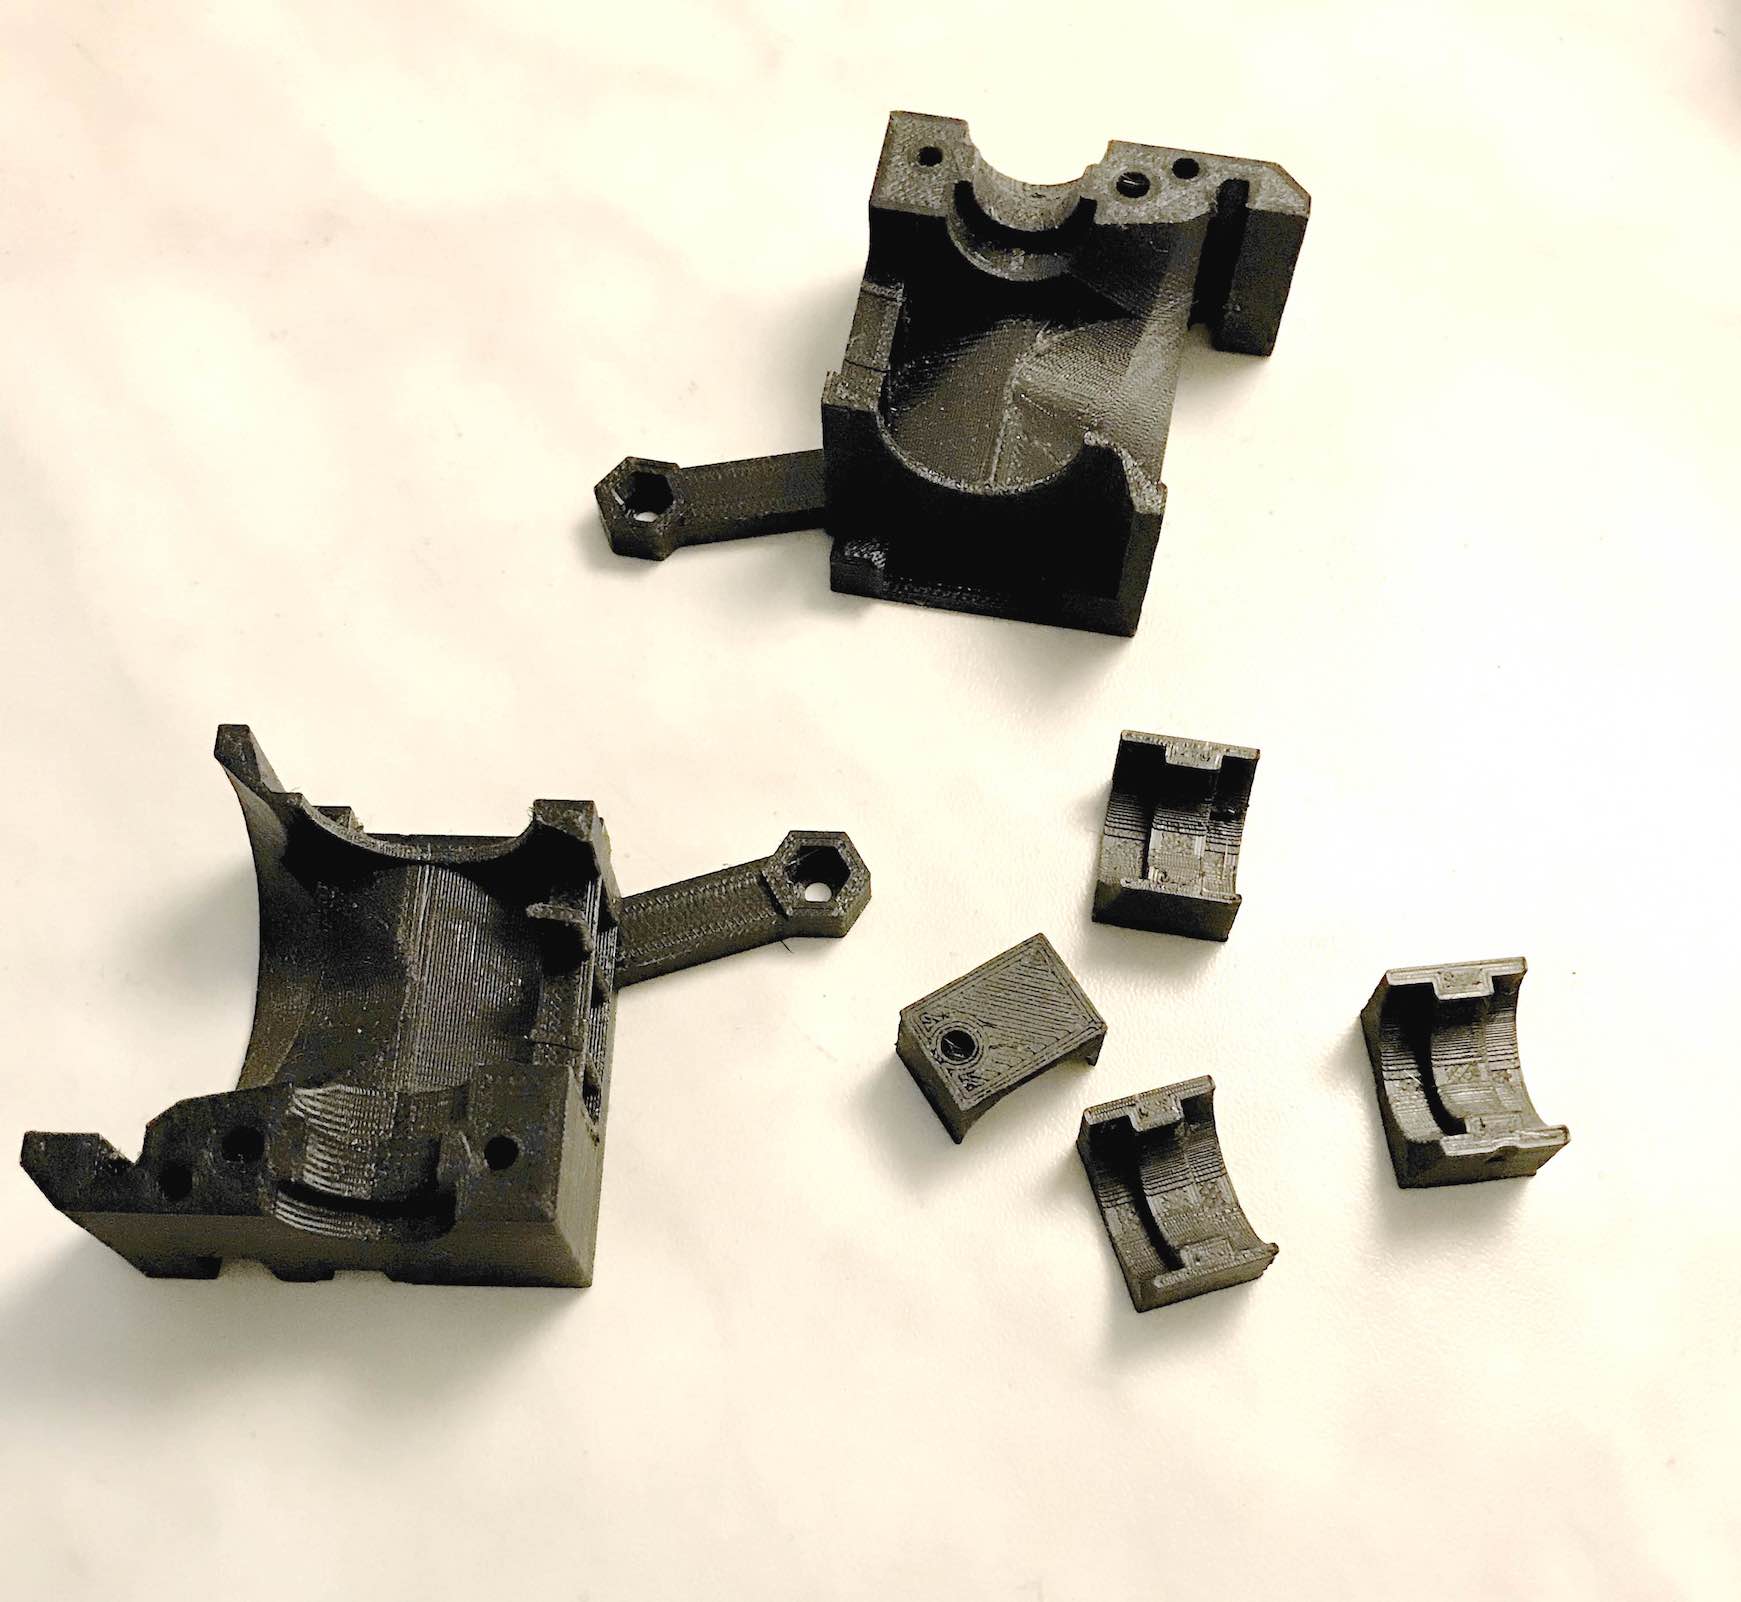
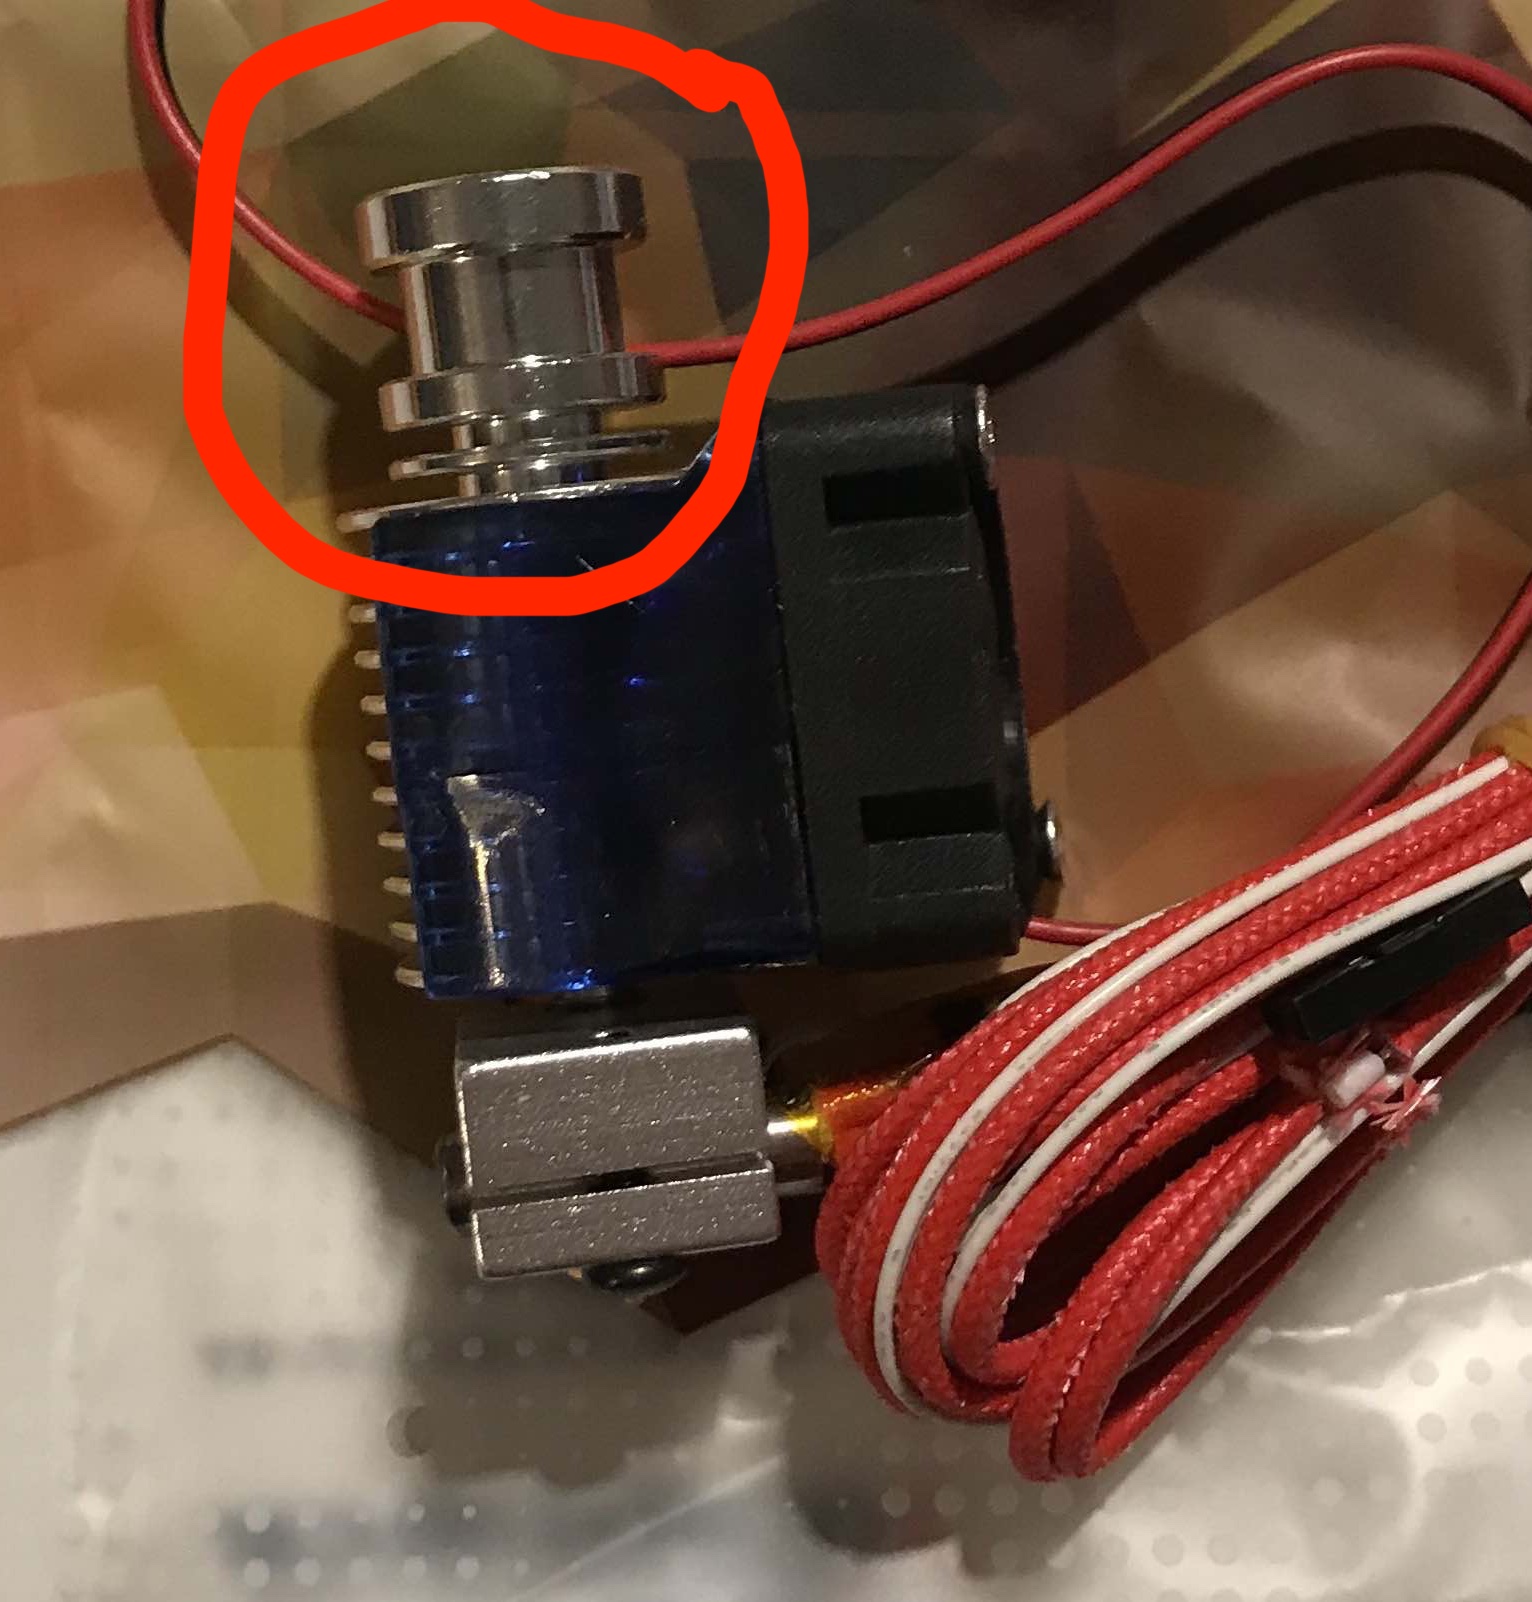
You can see what the extruder-cover looks like in the left picture. The top part that I re-printed multiple times is what holds the hotend in place and it just didn’t fit perfectly on my specific E3D V6-clone.
It was only off by a tiny bit, but enough to cause the fan holes not to be perfectly parallel - and I dont want to damage my 12€ Noctua-fan :P - as well as causing the nozzle not to be facing perfectly down when this whole assembly would be mounted.
Also, you should generally avoid unnecessary forces on 3D-printed parts to prevent failures.
 |
 |
|---|---|
| various test prints | E3D V6 hotend, see the part that has to be clamped down to hold it in place |
Solving that Issue
First try was to scrape off the excess plastic with a knife and sandpaper, but it wasn’t so easy to reach the desired surface with the sandpaper on this part.
So I went ahead trying to modify the STL - not working out as well, because it had non-manifold edges and Fusion 360 did not like that.
Then I remembered that Prusa publishes their CAD files, so I went on their GitHub to download the specific file. I was glad to see that they use OpenSCAD because I’m familiar with that software and its extremely parametric design workflow meant that modifying the location of the “indent” for the hotend was basically just modifying 2 numbers in the source code.
After doing this, I didn’t want to waste too much plastic in trial & error, so I cut up the STL with Meshmixer and printed those. You can see the little prints in the first image; it was enough for test-fitting and they printed in just a few minutes!
This saved a lot of time and material, meaning that after 4 prints I was done. These 4 prints still took almost 2 hours:
After each print, I had to wait for the heated bed to cool down, take off the part, test fit it, modify those 2 numbers in OpenSCAD again, cut the STL with Meshmixer and send the sliced GCODE back to the printer again.
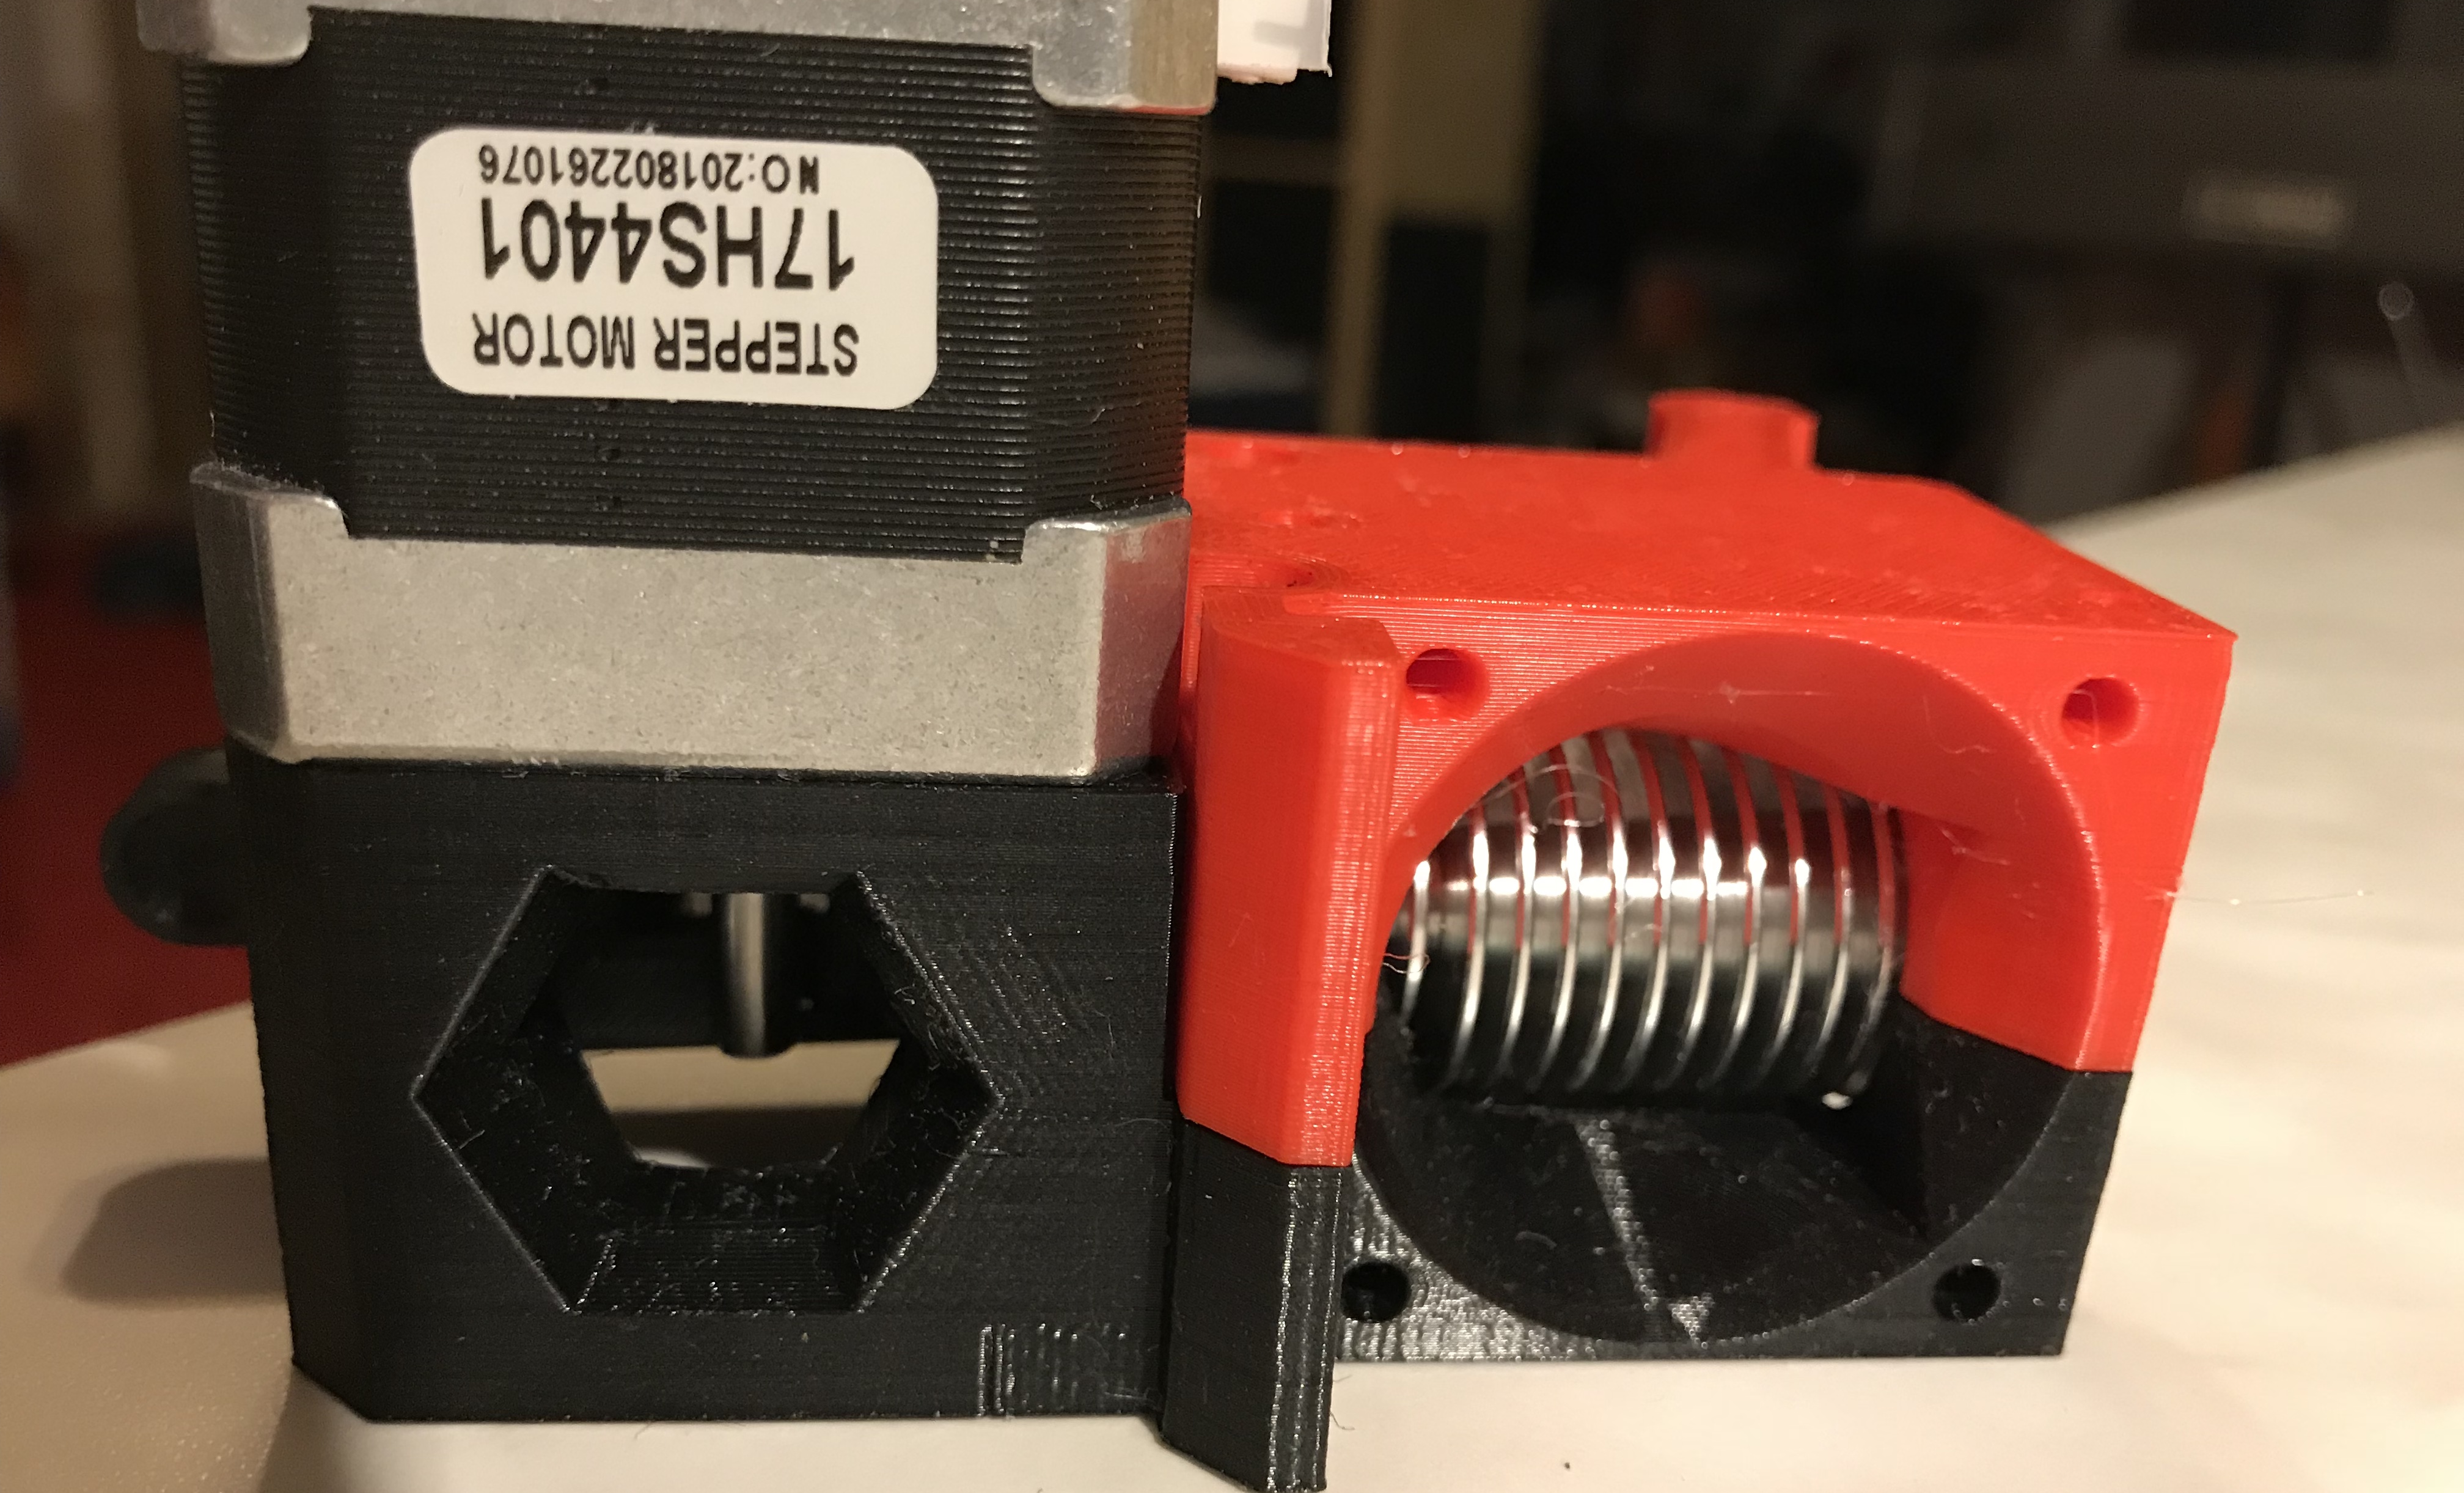
In the end I was happy with the result and for a complete test I printed the whole thing in this nice, red PLA because of my running-out supply of black PETG ;-)
Turned out that this design was perfect - the hotend mounting indent was moved by 0.65mm downwards - so the final piece could be printed in black PETG.
 |
 |
|---|---|
| It just doesn’t fit right! | Way better now… |
Final Assembly
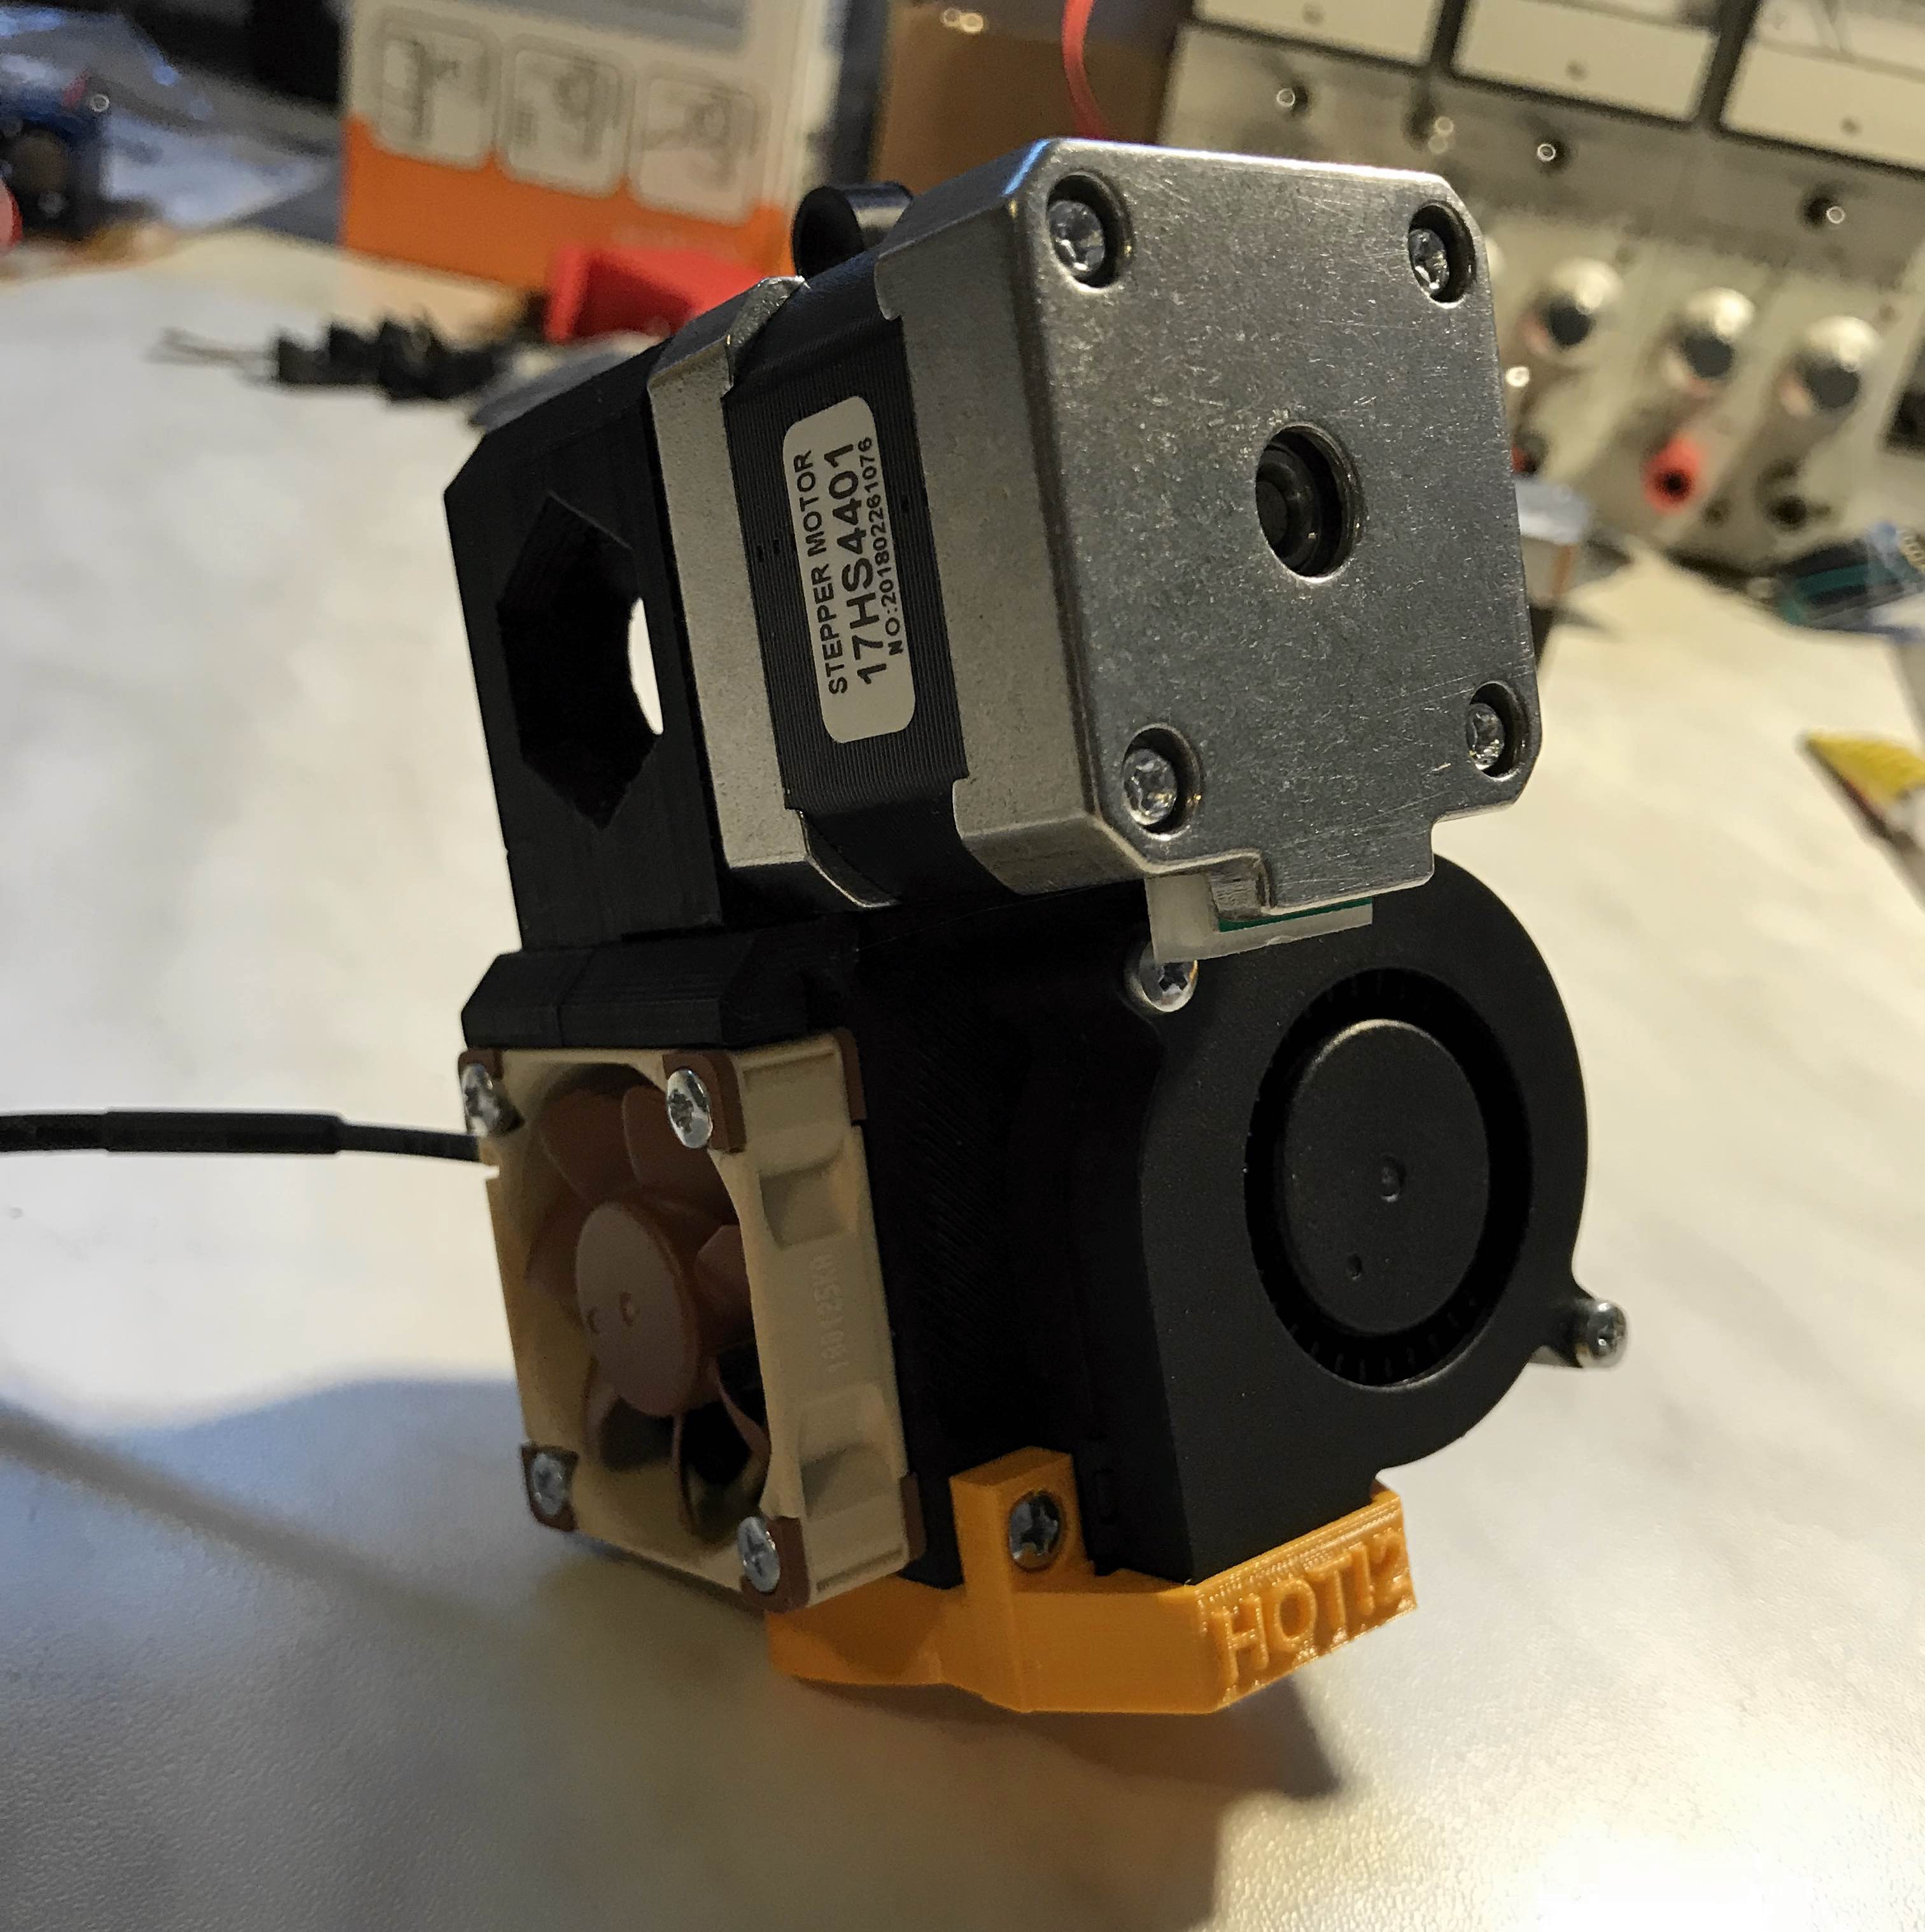
In the meantime, the Noctua fan had arrived. Because I already had the motors and an old radial fan from my other printer, I assembled everything to see how it looks like and if everything fits, so here’s the complete result:
Conclusion
As always, I will upload the STL and the modified CAD file on my GitHub because I think that the issue might be because of differences of size between the original V6 and this specific clone (which others might have, too).
Of course, the Z-probe is still missing but everything else on the extruder is basically done so I’m very happy about that.
Stay tuned for the next update where we’ll assemble the LCD!