
I first heard about Tasmota in my FabLab and wanted to try it ever since, just never got around to. It’s an alternative firmware for ESP8266-based IoT devices that is not only completely open source, but also runs completely locally, without contacting any external servers.
Let’s take a step back before going into the details, though.
My opinions and concerns about IoT
I’m personally not too fond of the whole IoT buzz, since people used to turn their devices on and off for over hundred years without issues and I think if we can’t walk to a light switch anymore, something’s seriously wrong. I never had the impression that a ‘smart bulb’ or ‘smart thermostat’ or anything like that would significantly improve my life and at which cost? You always run the very real risk of placing a tap into your home network each time you install such a device. Since Tasmota basically removes all security concerns and RGB LED lighting is fun anyway though, I gave some ‘smart’ LED bulbs a try (of course not with the stock firmware!).
Security researchers in my own team at SEEMOO found plenty of vulnerabilities in popular IoT devices as part of their dissertations and theses 1 2 3, as well as other teams worldwide 1 2 (both uncomplete lists). These vulns allow hackers to not only intercept and analyse traffic, but in some cases even remotely change the firmware of an IoT device, potentially giving them a root shell on this device that still sits in your home network. Hacked IoT devices can be used to perform DDoS attacks or also spy on you, in case you’re an interesting target for someone.
Even if you’re not being hacked and your IoT device is secure from known attacks, having these devices continuously connected to big corporations’ servers, some even with microphones and cameras in them, we can all imagine what can ‘go wrong’. You also totally rely on their service being online, so if a server has a downtime or they go out of service, in most cases you can’t control your smart device anymore.
Tasmota to the rescue \o/
Tasmota aims to solve the privacy and security issues as well as bringing MQTT support to devices that don’t have it out of the box and many other features.
Since it’s open source on GitHub, anyone can inspect the code and verify for themselves that it e.g. doesn’t connect to remote servers as well as contribute, add support for new devices or add new functionalities. Open Source is always great!
As mentioned before, Tasmota completely replaces the original firmware on any supported device. After flashing the chip, it offers an access point that you connect to and configure it to communicate with the hardware (e.g. LEDs) via a web-based UI in which you also enter WiFi credentials and MQTT server IP. Here’s the interesting bit: Tasmota contacts and communicates with an MQTT server run by you, which in my opinion should always be in your own home network for best security and privacy. After all, you’re most likely to want to control your stuff when you’re actually there, right?
Tuya-Convert
Tasmota in and of itself is meant to be installed onto an ESP8266 like you’d always do: solder wires to VCC, GND, TX, RX, GPIO0 and hook it up to an FTDI programmer / USB to serial adapter, then upload the new firmware from your computer.
As mentioned earlier, there are exploits that allow you to reflash an IoT device without opening it or requiring any soldering at all by hacking the update procedure. Security researchers used exactly this vulnerability to reflash IoT devices from a brand called Tuya with Tasmota over the air. They created a tool to perform all the necessary steps which is called tuya-convert, so I tried that first.
The hack is super cool and I recommend everyone to go watch the talk that tuya-convert is based on before continuing to read this post if you haven’t seen it yet.
https://media.ccc.de/v/35c3-9723-smart_home_-_smart_hack
Unfortunately, in my case it didn’t work, either because my bulb was too new / firmware was already patched against that vulnerability or it just didn’t run Tuya FW in the first place.
UUT Hands-On
So, my unit under test was a MOKO YX-L01C-E14 A60 810lm RGBW Bulb, since there was already a Tasmota template ready to go and it had good reviews.
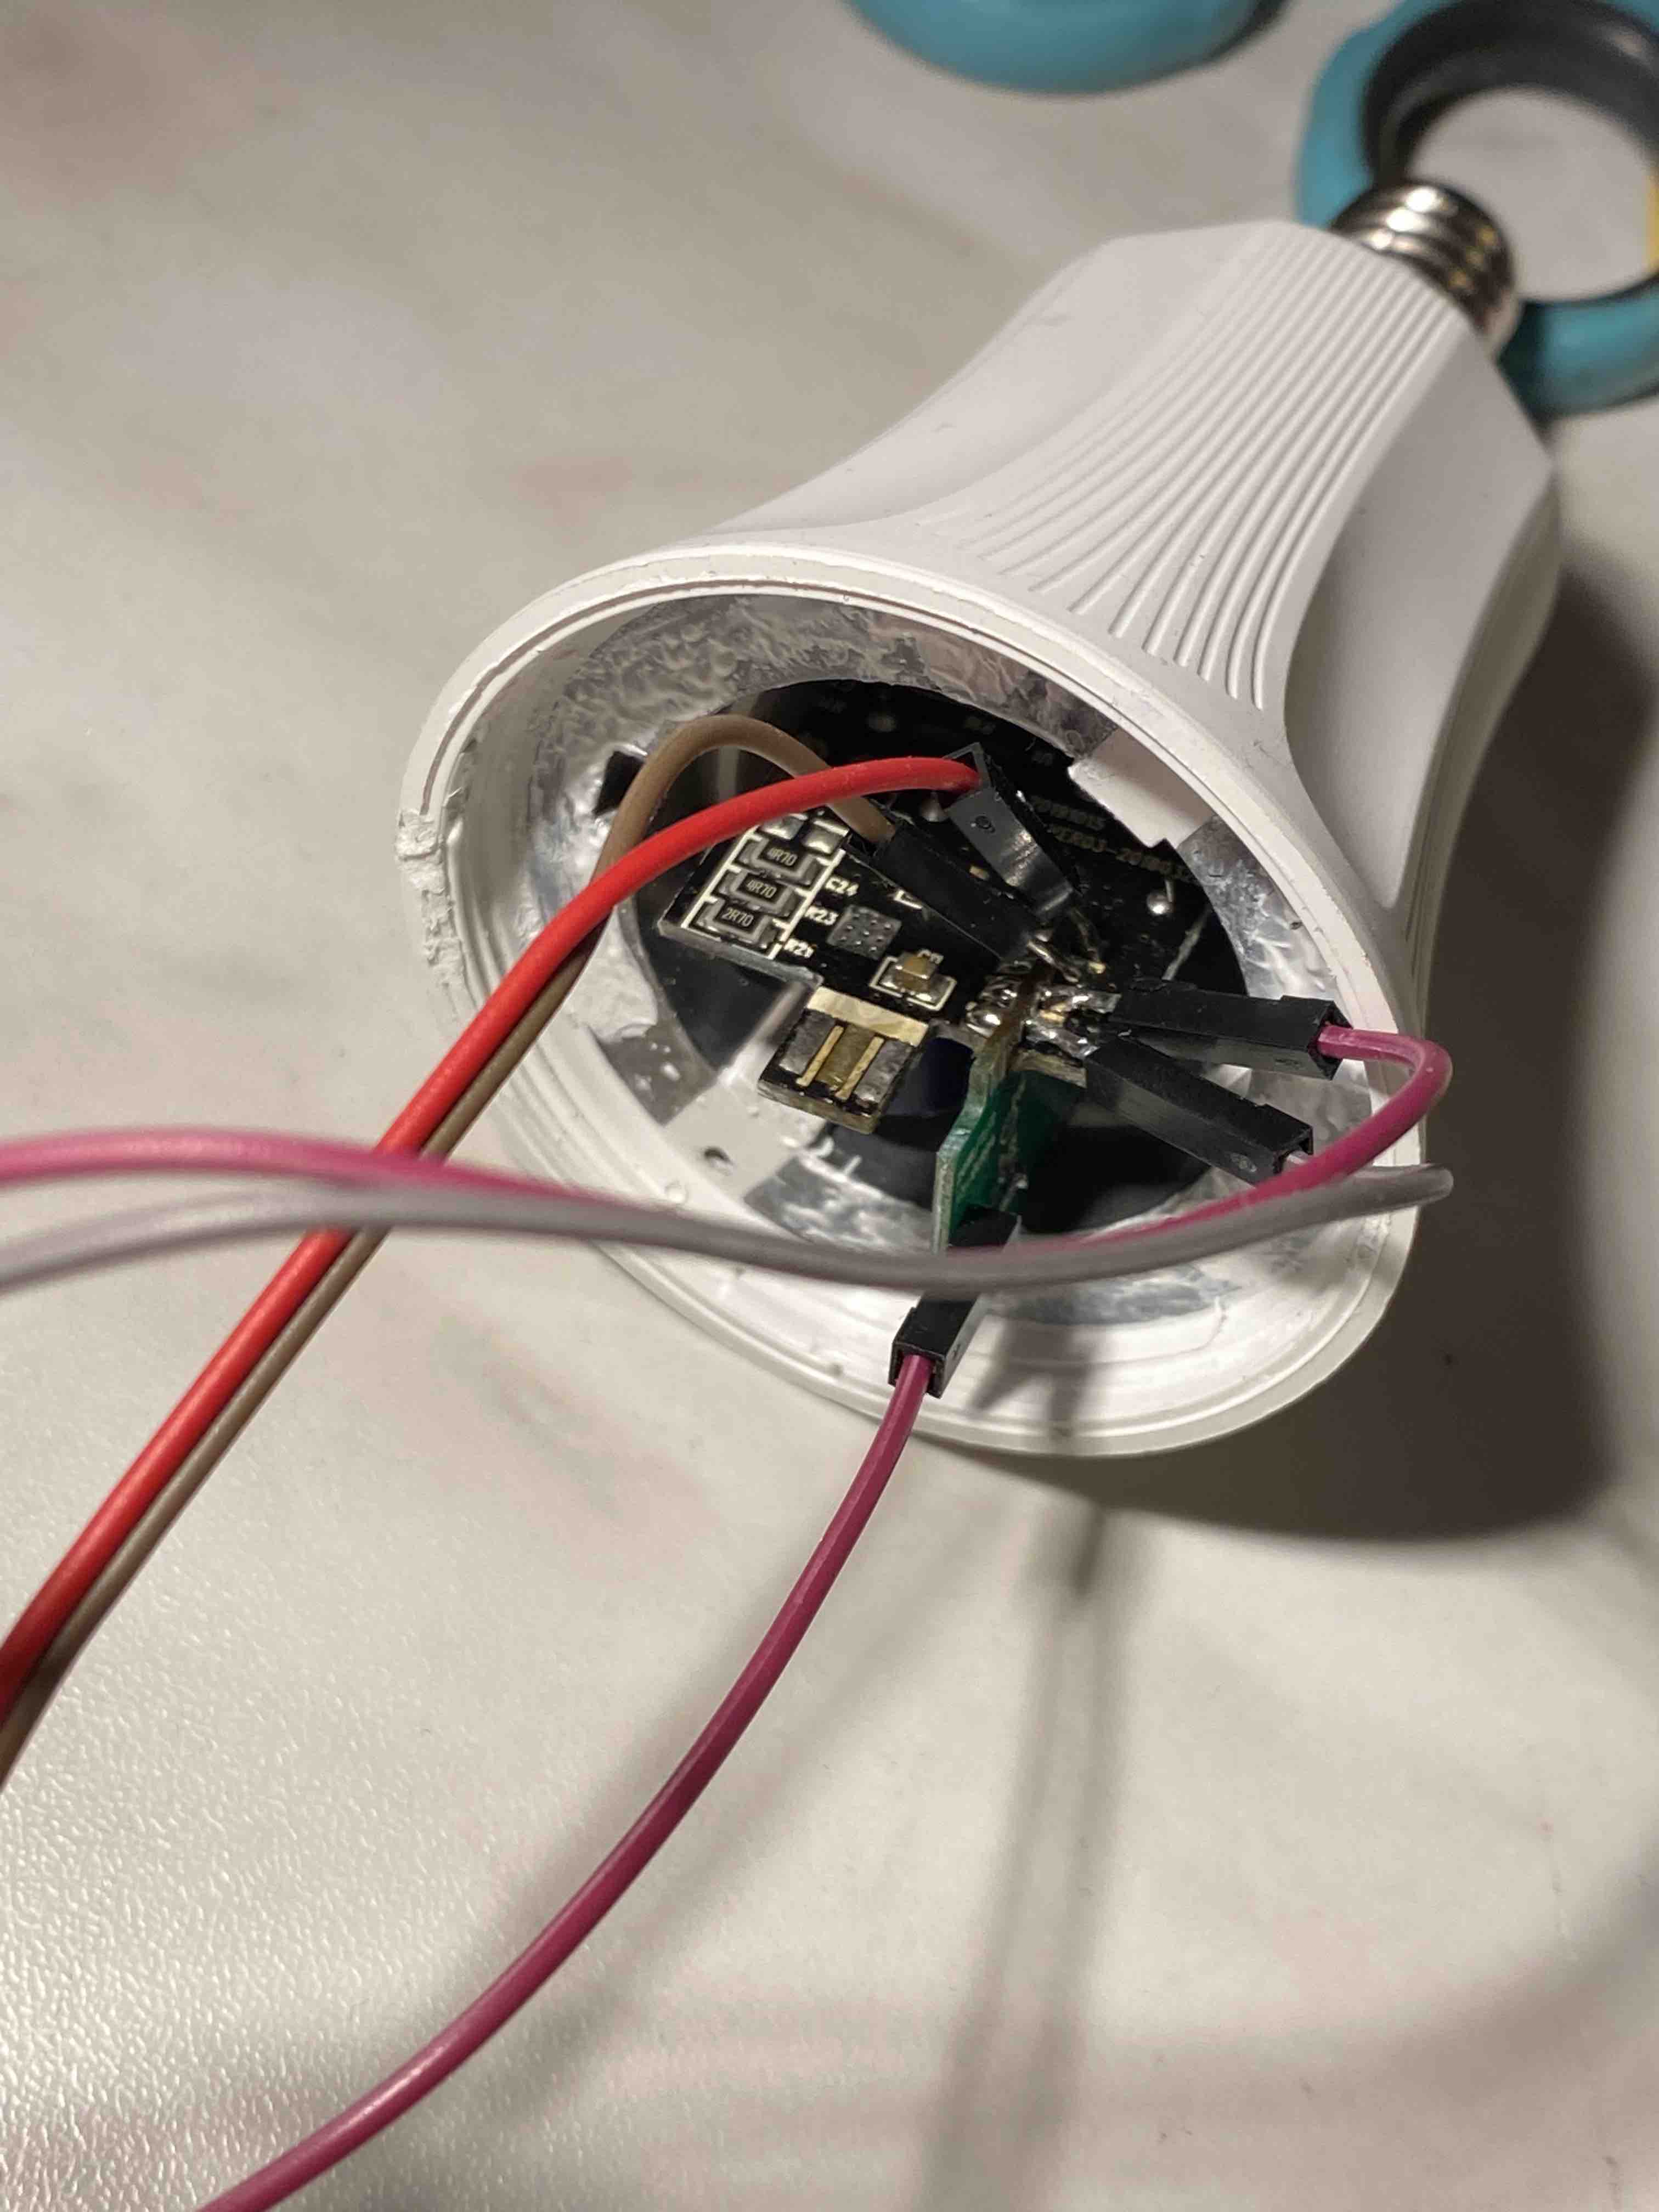
I had to open it and find pads to connect my FTDI programmer to. This is how the bulb looks without the plastic cover off and the top board removed. The top board just houses the LEDs and a few passive components. It is easily desoldered and underneath two more boards are found.
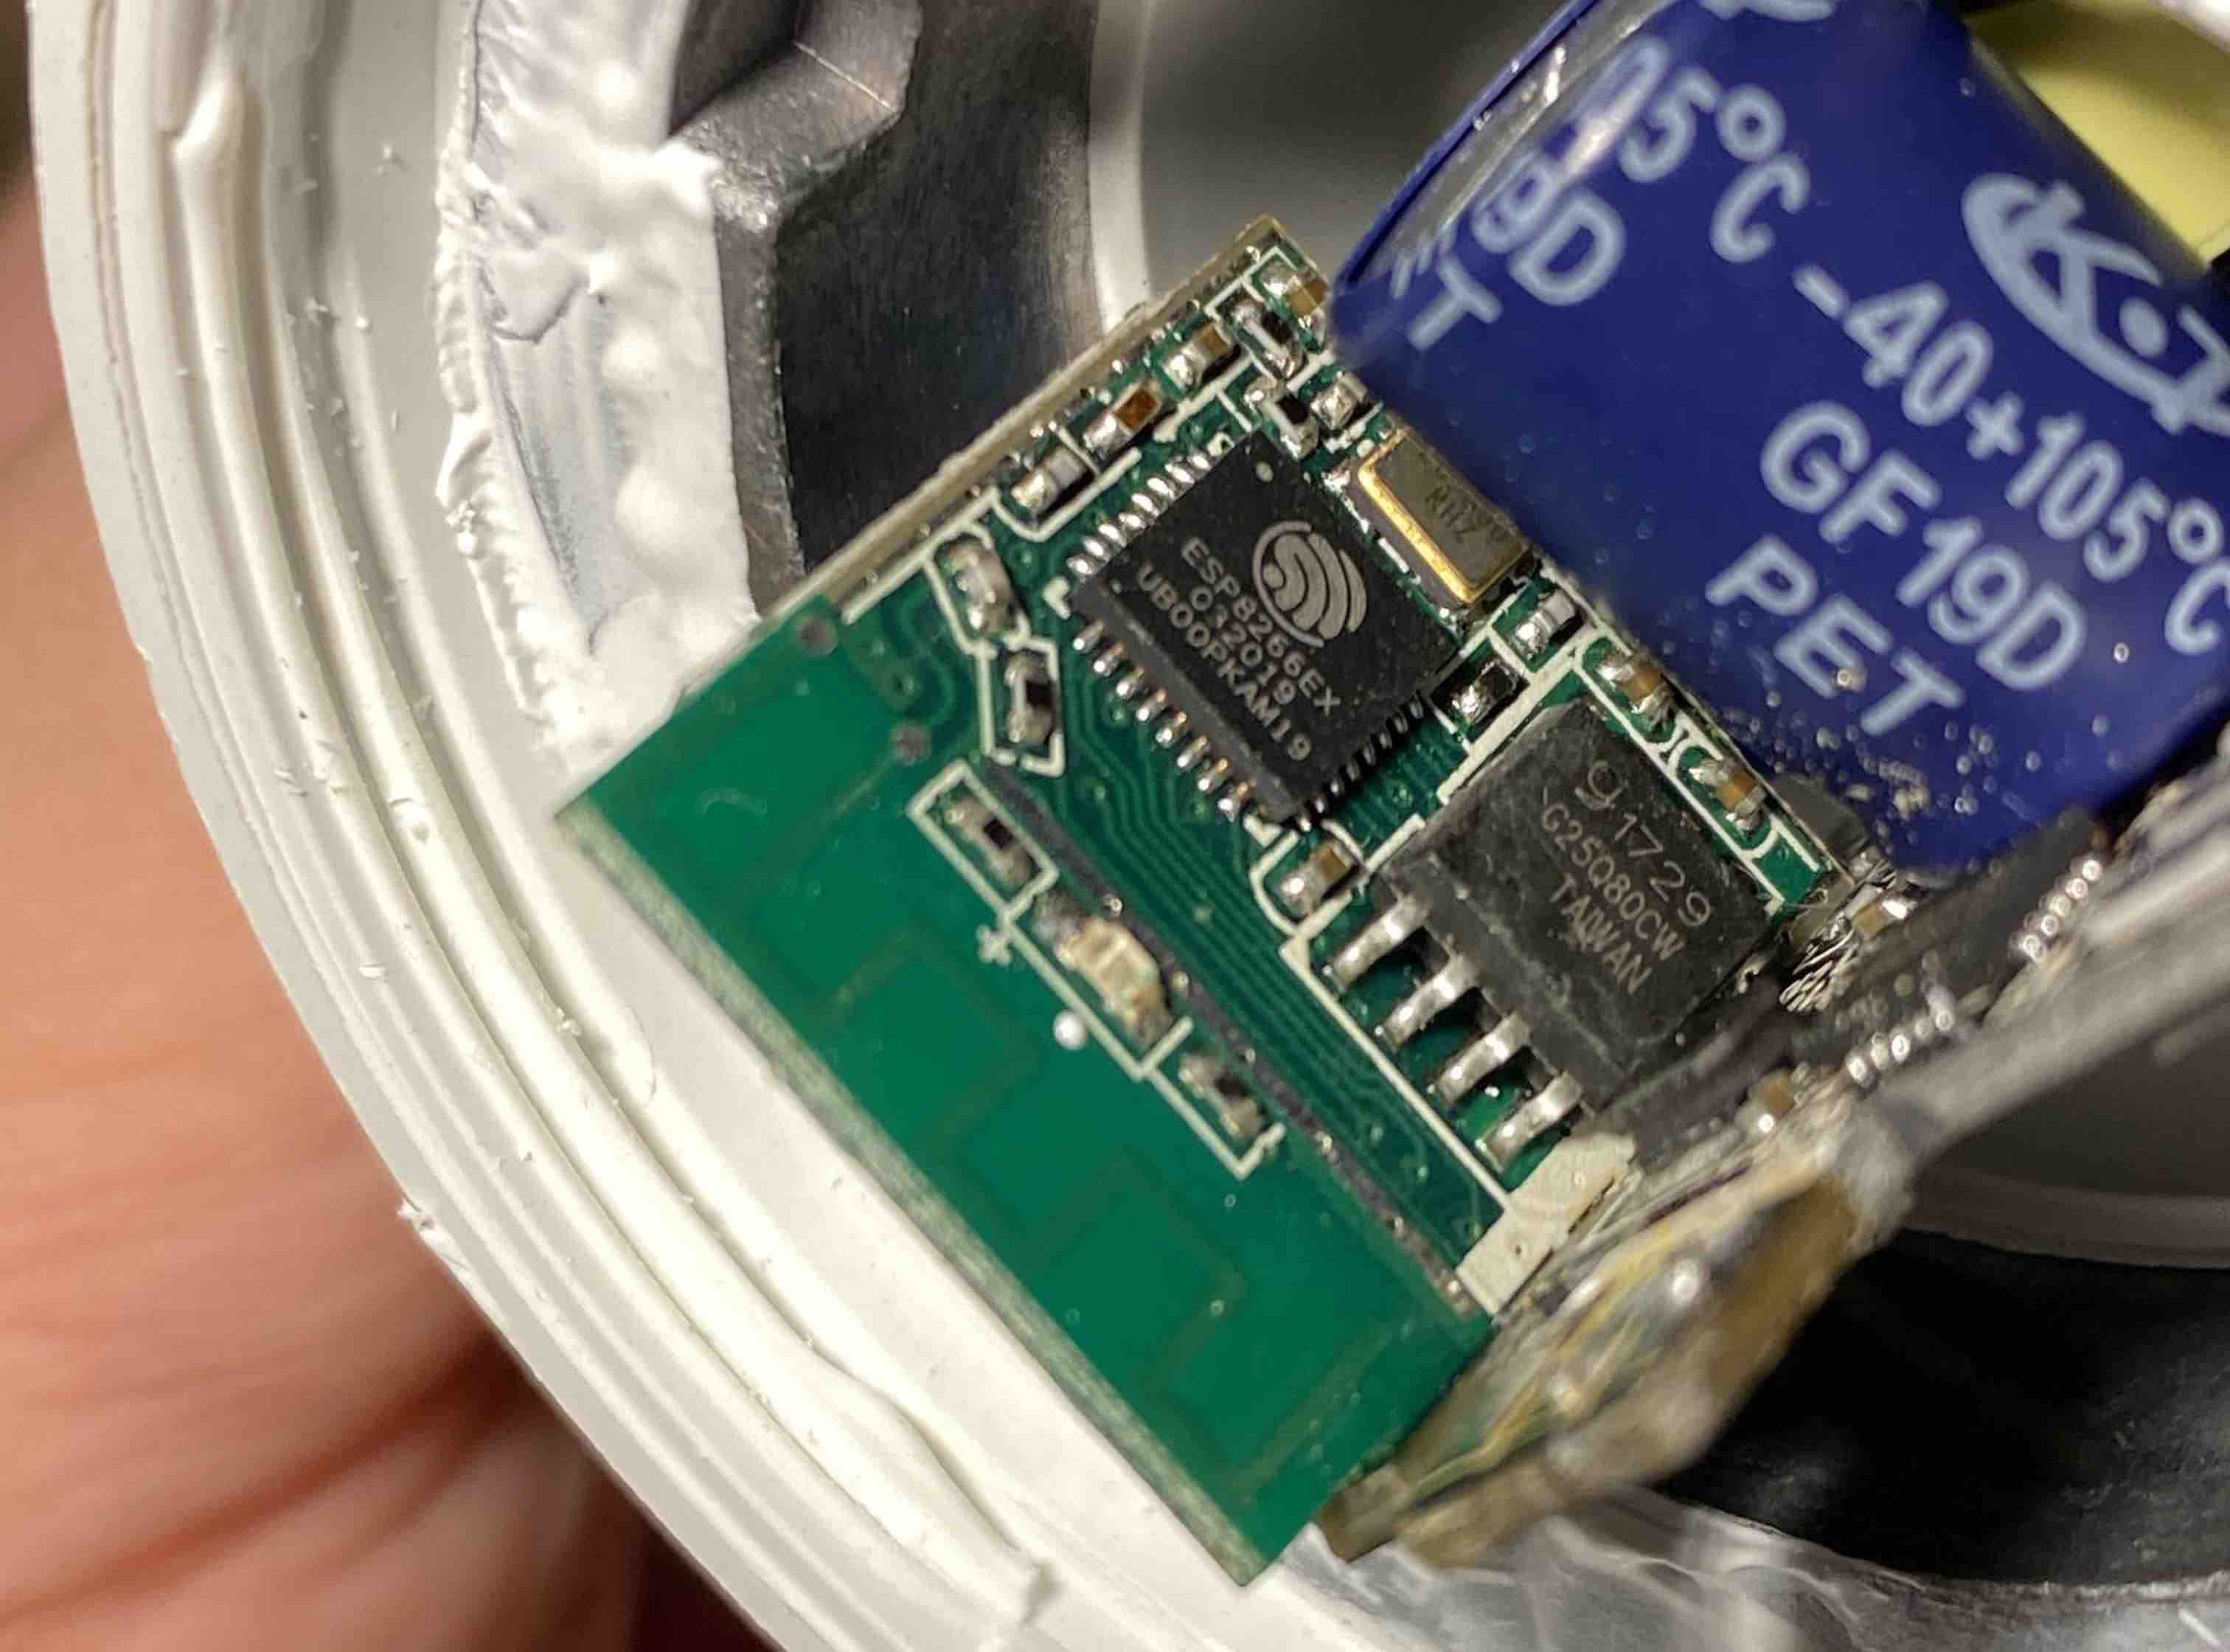
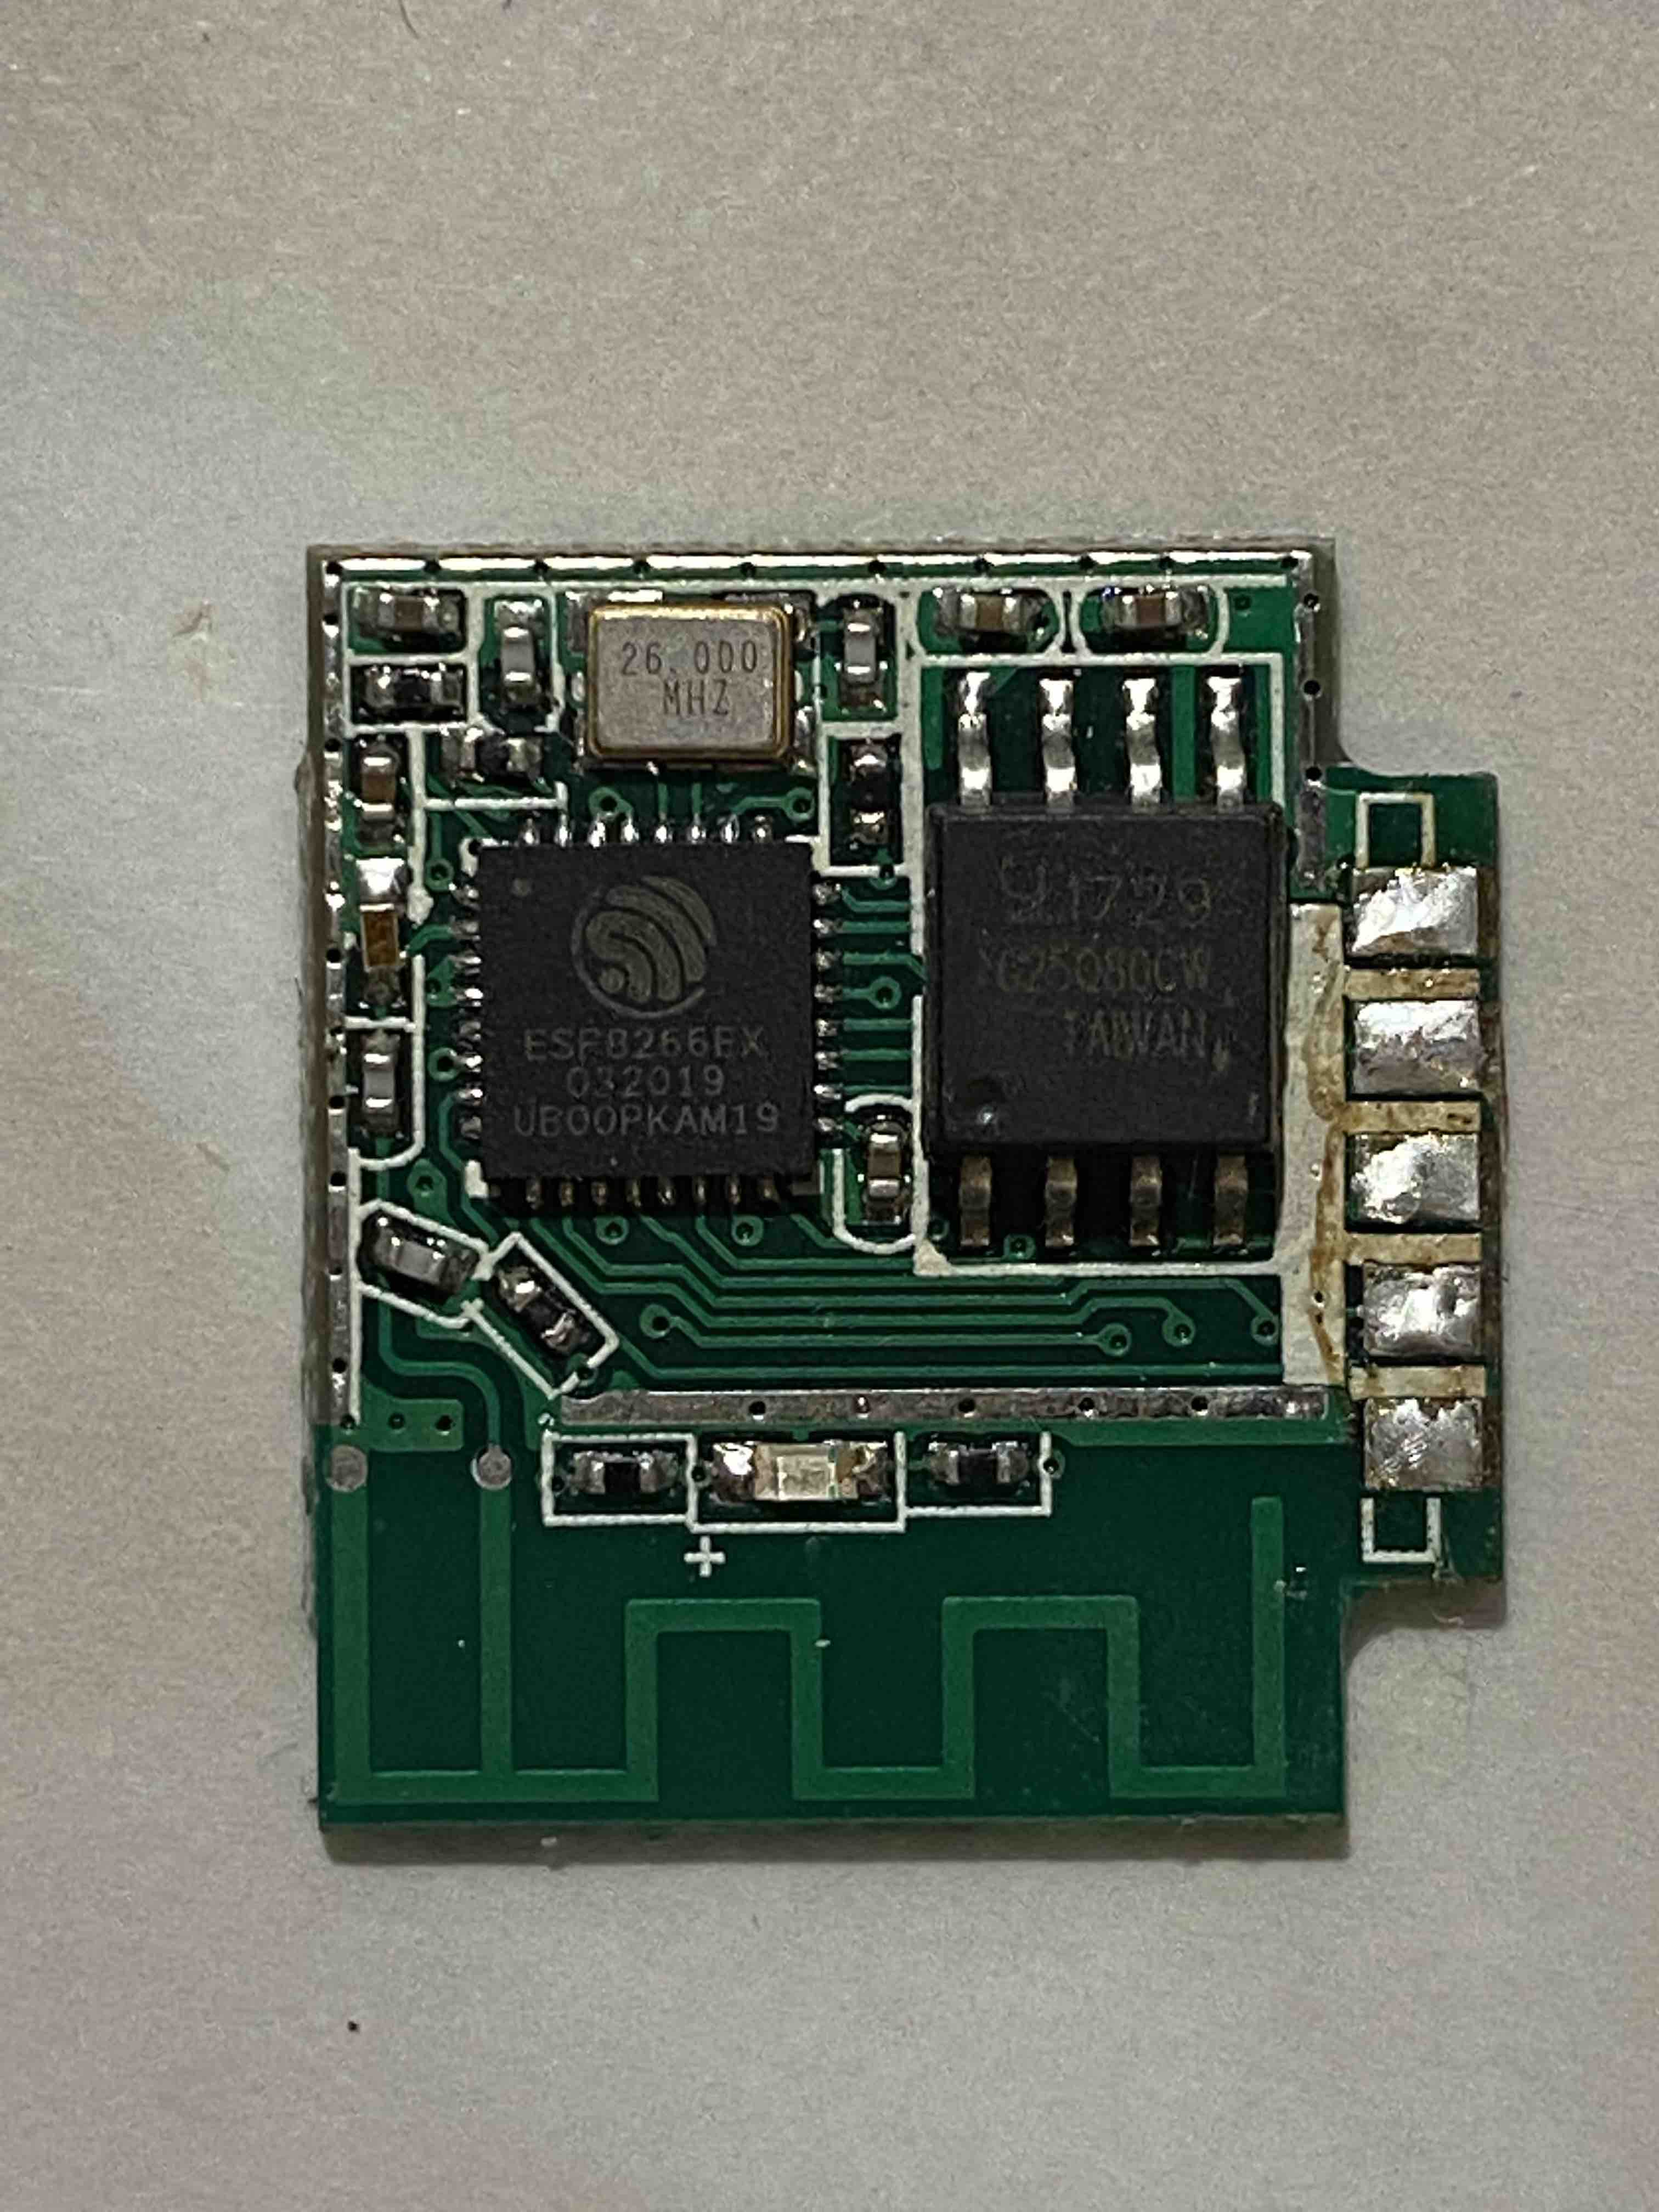
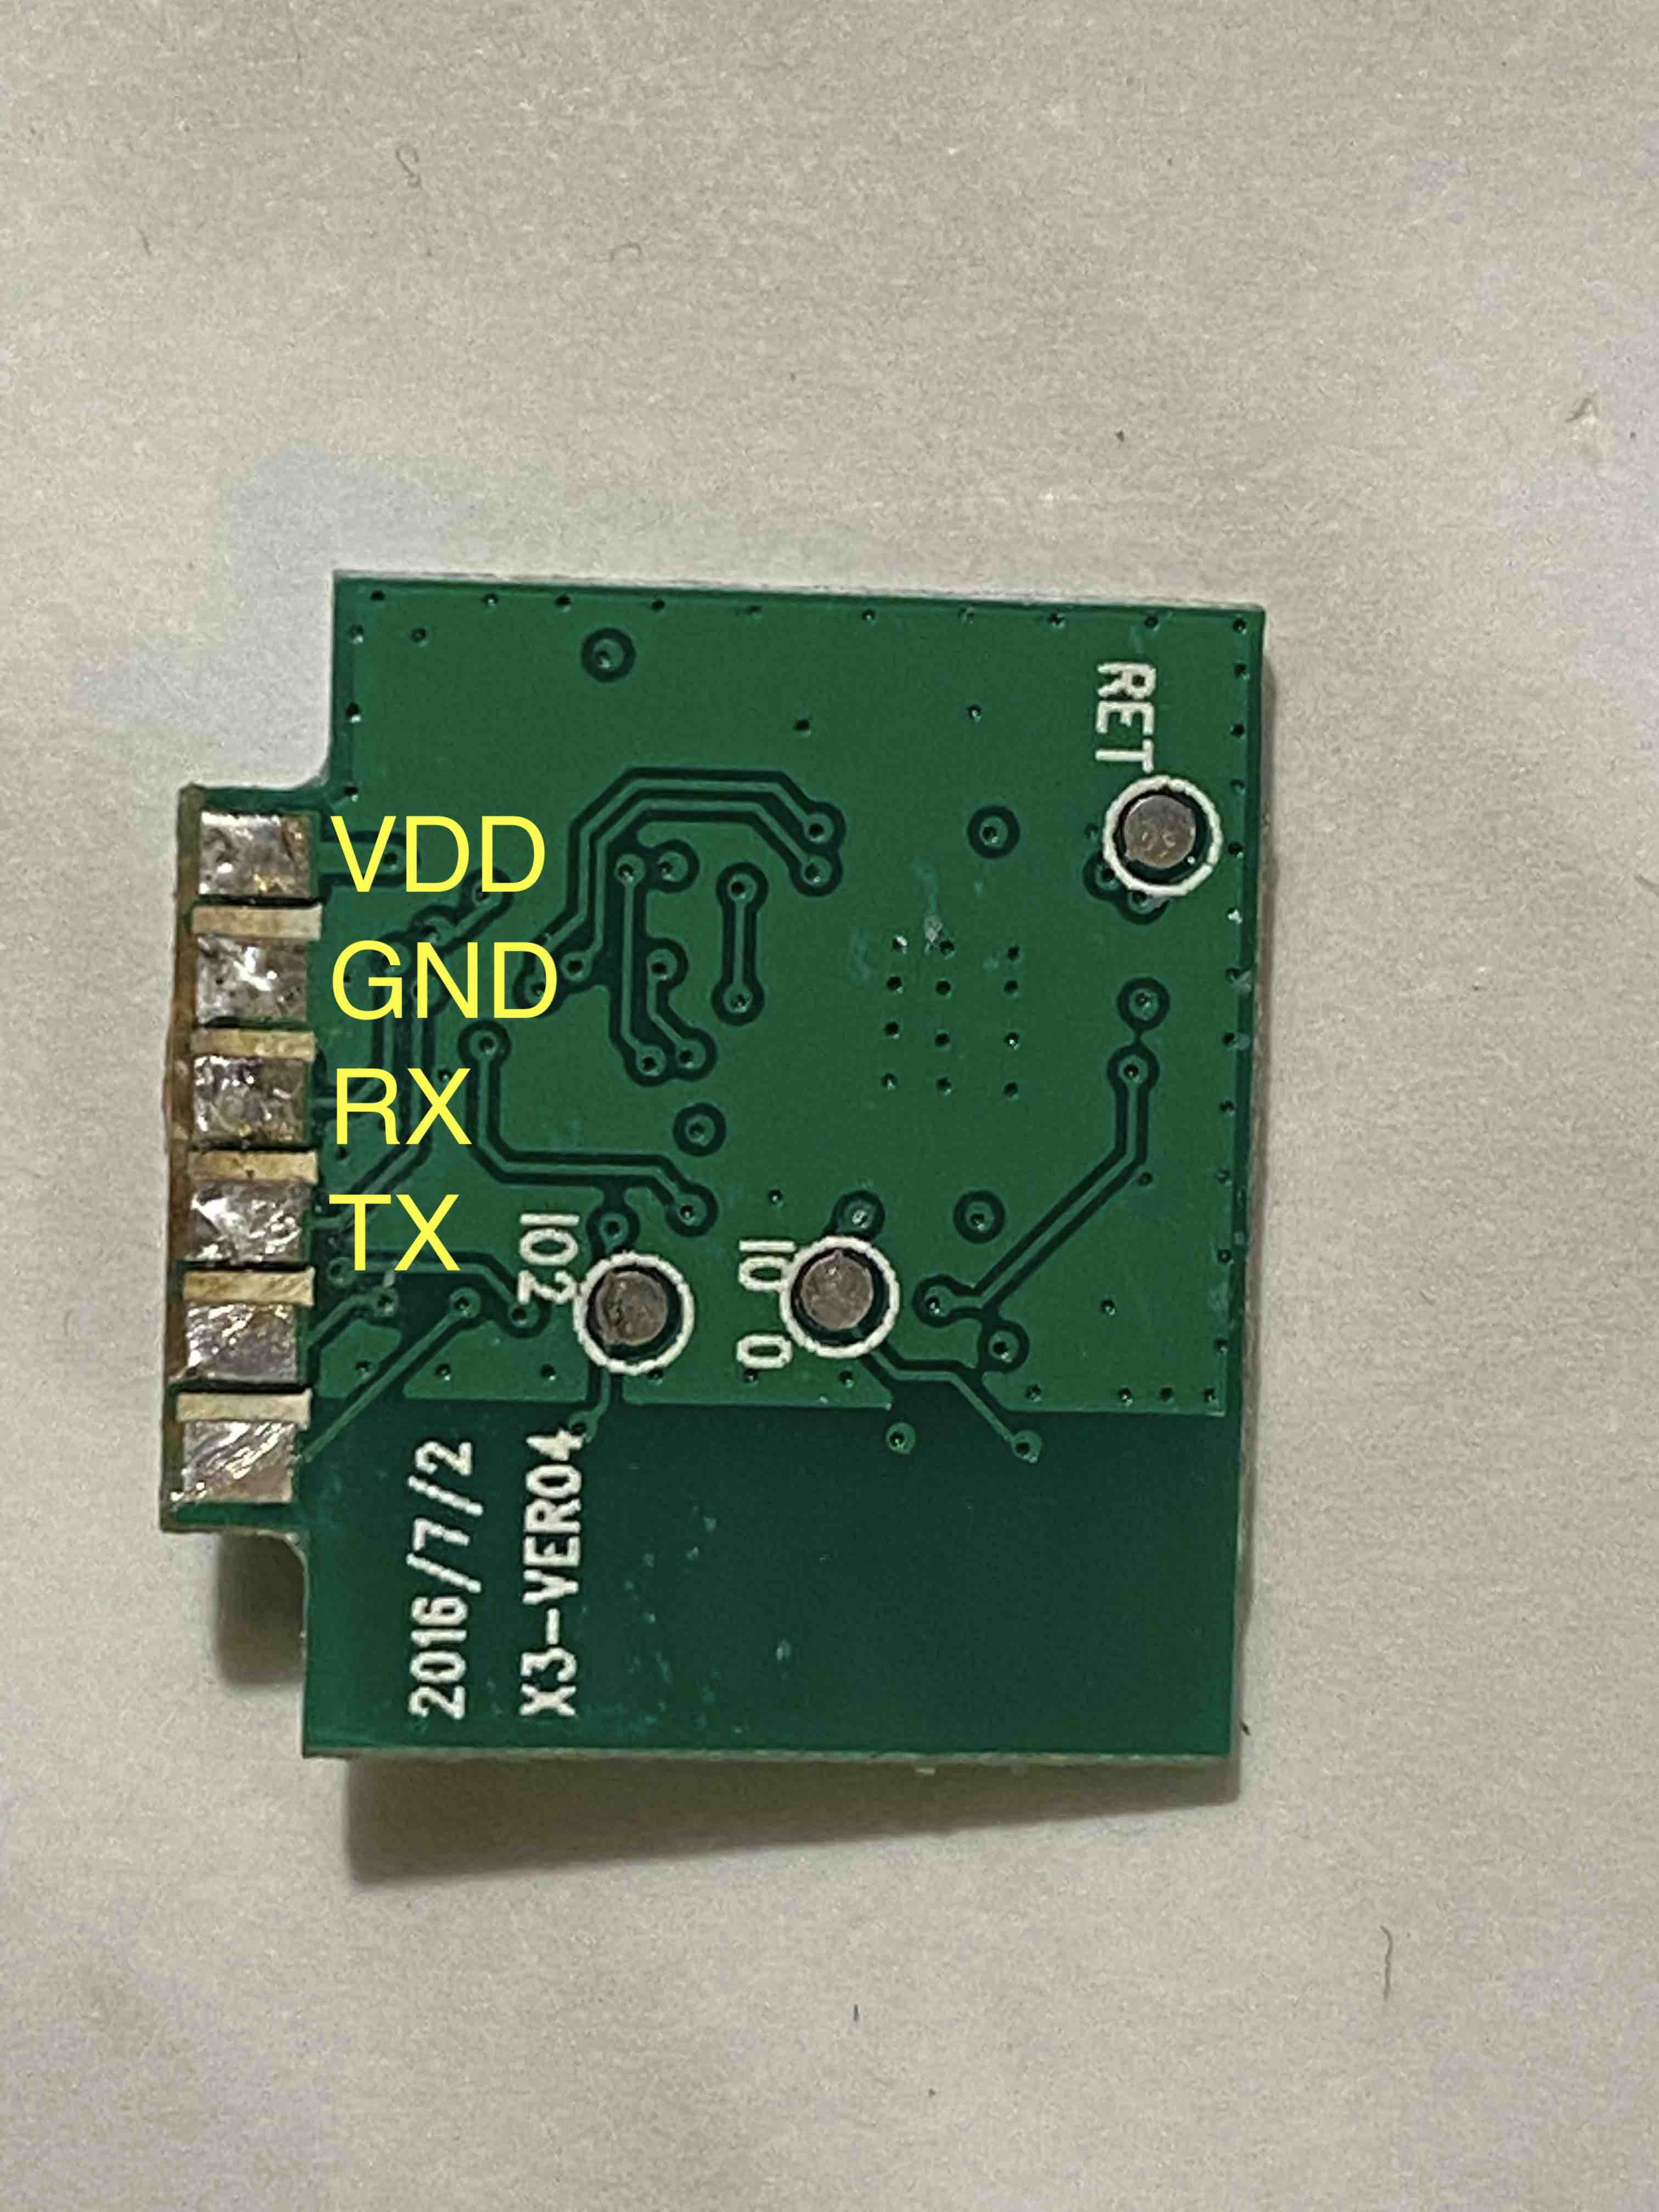
The main board on the bottom carries the power supply, converting 100-220V AC to lower DC voltages and the second board, soldered at a right angle carries the ESP8266 chip. Neither have broken out, labelled test points for easy reprogramming (except GPIO0 and GPIO2 pins), so I had to take the ESP board out and performed a few quick continuity tests.
 |
 |
|---|---|
These showed me which pins on the package correspond to which pins on the right angle connection. VCC, GND, TX and RX are all broken out to that connector and GPIO0 is broken out as a test pad on the back of the board. With this knowledge, we can put the daughterboard back in and solder directly to that right-angle connector and the test pad on the back.
 |
 |
|---|---|
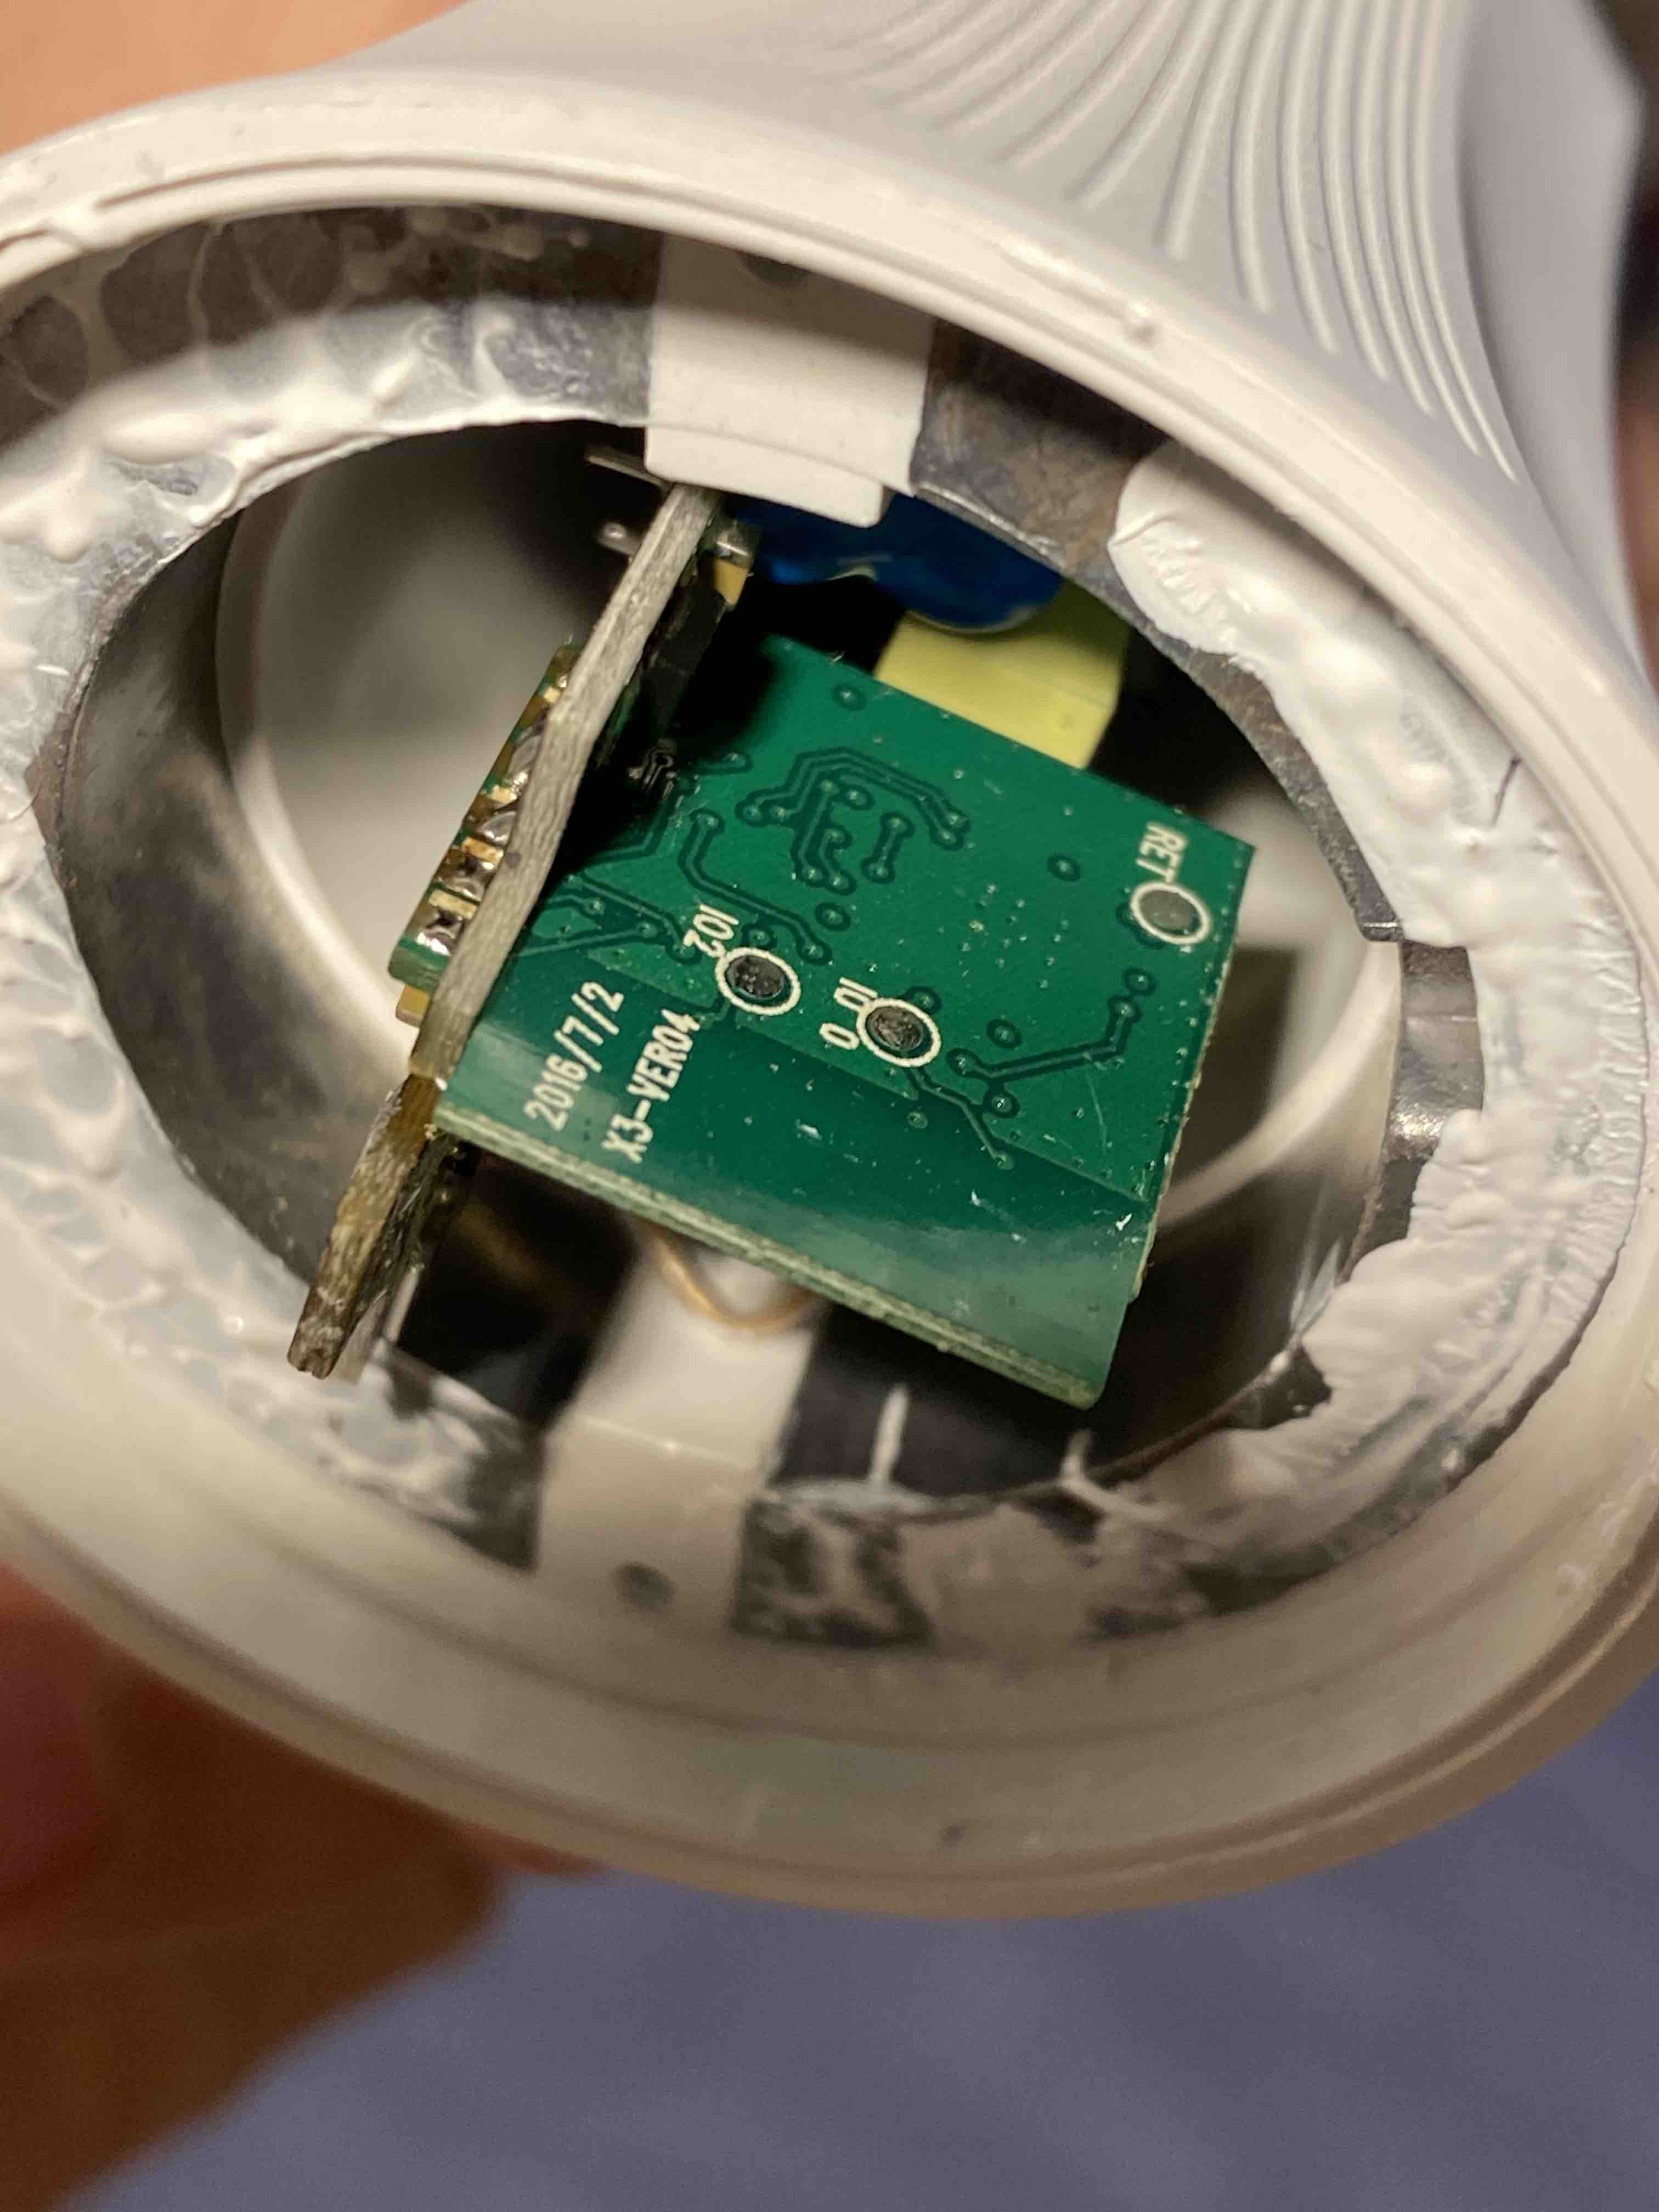
Afterwards, just put the top board with the LEDs back on and close the top. It’s important to note that in case you replicate this with the same bulb, you’ll save a lot of time and hassle since you won’t have to desolder the daughterboard which was quite the pain.
Software
I installed mosquitto onto a local Raspberry Pi as my MQTT broker. Most importantly for me, this is also open source and widely used. Then, I connected to the bulb’s IP and configured it to use the Pi’s IP address as its MQTT broker. This means the bulb subscribes to the mosquitto server on specific topics that the Pi can send command to and control the bulb. There is both a device-specific topic and a group topic, so you can control multiple devices (e.g. a room or a big lamp with multiple bulbs) at once using groups.
Additionally to the MQTT broker, I also got homebridge. Directly from their GitHub page: Homebridge is a lightweight NodeJS server you can run on your home network that emulates the iOS HomeKit API. Of course, this component of my IoT system is also open source. This means I now have a fully open source IoT stack, from the low-level firmware directly on the device itself up to the servers that allow me to control the stuff inside my home network. I can now also control the bulb (and any subsequent devices that I might buy) from iOS via the control centre, the Home App and Siri, as long as I have a connection to my Raspberry Pi.
Conclusions
-
This was a fun 1-day project for me and I really enjoyed it: Good, open source software that was easy to install and gave no issues. A little bit of easy hardware reverse engineering. Soldering! A working device at the end of the day :)
-
I’m still not convinced why I’d want any other ‘smart’ devices (let’s be honest, most are still super dumb, they basically just turn on and off like they always did), but LED bulbs and light strips might be an exception since you can do colours and effects which is normally not possible.
-
The dimming functionality was probably my favourite feature, it’s very nice to be able to dim your lights in the evening or morning, but I do realise it’s also possible with regular light bulbs.
-
Depending on how much you care about security and how many devices you plan to install (let’s not forget that most home networks only allow up to 255 addresses), it makes sense to use a separate router as your ‘IoT hub’, connect all devices and your Pi to that instead of directly to your home network and then block all internet traffic to and from that router (like I did).